I love the trend of these beautiful hand dyed marbled and speckled yarns that are all over knitting blogs and Instagram. When I saw this ombre sweater, I was instantly hooked. I googled around to see which yarn it was. Much to my disappointment, the yarn is a sweater set by Madelinetosh in the color „optic“ that doesn’t seem to be on sale anymore, and even if it would be, I could never afford, especially not with shipping to Europe and German taxes added. So it happened what mostly happens when I can’t afford something but really want it… I decided to make my own speckled yarn! I entered the dark hole of google research on how to do it and it became clear that I am moving on new terrains. There are lots of different yarn-dyeing tutorials out there, but nothing that could really answer my questions.
So I ordered some inexpensive drops yarn, Fabel sock yarn (75% wool, 25% polyester) as a tester and Nepal (65% wool 35% alpaca) for a sweater, and bought some black batik dye powder at Modulor. From the various tutorials online I learned, that I had to wind my yarn in loose skeins and soak them in warm water with some wool soap for about 30 mins, and that protein fibers need some added vinegar for the dye to last. I also learned that you have to heat-fix the color to the yarn and that you can do this in the oven.
So I embarked on my dyeing adventure and kind of made my strategy up along the way. I soaked my yarn and placed it in oven proof tarte dishes, and sprinkled on the dye powder. I waited a bit and added some water here and there to dissolve the powder. Then I sprinkled on some extra white vinegar to be safe and placed everything in the oven. I baked the yarn for about 30 mins, until the wool was hot and steaming. After that the wool needs to cool off before you can rinse off the excess dye. Wool can never be „shocked“ with hot or cold temperatures, as it might felt, so be sure to wait long enough after baking it. Rinse the yarn with some wool detergent in lukewarm water until the water runs clear. I was surprised and happy to see, that the yarn lightened up a bit after washing it.

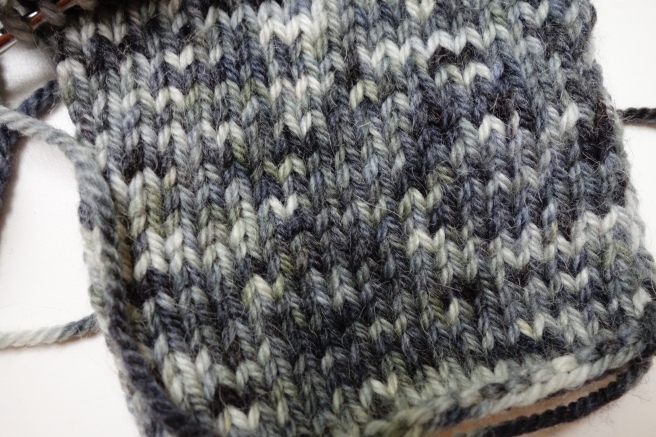
After leaving the yarn to dry, I was quite happy with my result! The first try turned out quite well and looks nice knitted, too.

What I learned so far:
– The sharper you want the contrasts to be in your yarn, the drier the wool has to be, If you want a sharp contrast, don’t add extra water after placing the skeins in the oven-proof form, and don’t move the skein after sprinkling the dye powder on top.
– The 100% natural fiber seems to take up the color much better and also soaks it up, which means, the black turned out more grey and more „washed out“ so be careful when you add the powder.
– My impulse was to add more and more dye powder. Don’t do that if you don’t want your yarn to be black. The dye will spread with time and especially when it is in the oven, as the powder dissolves in the hot water.
– It was no problem at all to fix the dye in the oven, my superwash sock yarn with 25% polyester didn’t melt or burn at 150°.
– Avoid letting the yarn sit in water before you are done rinsing it, the white parts of the yarn might still catch some dye and turn grey.
Maybe you will be inspired to make your own speckled yarn? Do you have any tips on which dye to use?